All blog posts ……..Start each work week with the latest issue. Scroll down to subscribe!
12 tips for creating videos learners actually watch
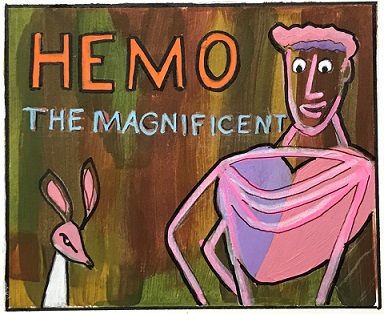
Video (if you count its predecessor, film) as an instructional medium is older than you might think; and so is the concept of disruption. Hemo the Magnificent, directed by Frank “It’s a Wonderful Life” Capra, was one of several educational films released in the late 1950s and distributed to public classrooms. Big business had decided that film was going to revolutionize education!
Not much revolution occurred, although film/video did persist and gain traction as one instructional medium of many.
These days, video is so ubiquitous that it’s often one of the first things we think of when we’re considering how to develop engaging, appealing instructional materials.
But while it’s true that video can be an effective instructional format, it’s not the best choice for every—or even most—instructional scenarios.
The tips that follow can help you determine whether video is the best fit for the instructional job at hand and, if so, how to produce the most instructionally effective video possible.
1. Ask yourself if there’s a better option.
Depending on your audience and what you’re trying to communicate, video might not be the most effective approach.
Consider the following video pros and cons.
- PRO: Video excels at communicating visual processes, change over time, and real-life situations.
- PRO: Video that features people’s faces can be effective at driving empathy and emotion.
- PRO: Video is an effective way to introduce topics.
- CON: Video takes longer for audiences to consume than text.
- CON: Videos is more time-consuming to create and maintain (and more difficult to execute well) than many of us believe.
- CON: “Screen fatigue” can result in audiences fast-forwarding videos, playing them double-speed, or skipping them altogether when they can (and, when they can’t, reading the transcript instead).
- CON: Video isn’t good at driving recall of multiple facts or steps.
- CON: Video isn’t easy or quick for audiences to review.
2. Plan your content.
If you’ve decided to go the video route, create a table of contents first, then flesh that table of contents out into a storyboard. To do so, massage and expand the tale of contents into a voiceover narration script. Then, for each 5-10 seconds (or so) of narration, decide what onscreen visuals should support that narration.
3. Keep it short.
Go over your storyboard and tighten it up, paring the content down to the essentials: your learning objectives, and just enough description to explain those learning objectives.
4. Restrict onscreen visuals to relevant images that actively support objectives.
If you find yourself tempted to add AI-generated “clip art” just to have something onscreen, the content probably isn’t a good fit for video. Develop the content as text or an interactive instead.
5. Chunk it.
If your video running time is longer than a couple of minutes, divide your video into labeled, timestamped chapters or a even a series of discrete mini-videos presented alongside a menu. (LinkedIn Learning exemplifies this latter, extremely effective approach.)
6. Support it with text.
Provide both accurate closed captions and a transcript. Doing so helps meet accessibility guidelines and also supports novice audiences, non-native speakers, and literate audiences who prefer transcripts because they can be consumed faster.
7. Begin and end explicitly.
Begin with an intro that includes a title (and, if appropriate, a description of the target audience and running time). End with an outro that repeats the title and thanks the audience for watching. These aren’t simply niceties or ways to brand videos; they also convey information audiences need to control video consumption.
8. Bookend background music.
If you like, include music to the intro and outro. Don’t, however, add background music to any other part of an instructional video. (Music distracts and degrades the audience’s ability to focus on narration and onscreen visuals, and learners can’t turn it off without also turning off narration.)
9. Use callouts
Don’t rely on audiences to figure out what you’re talking about. Focus your audiences’ attention to specific areas onscreen deliberately using arrows, circles, and (if appropriate) short passages of explanatory text.
10. Show/test/show.
Intersperse short videos with multiple-choice questions to reinforce key points and measure the extent to which learners are mastering them.
11. Repeat key points explicitly.
Present key points or “take homes” (learning objectives) onscreen at least twice: as part of a preview, and as part of a recap.
12. Watch your stats.
If few audience members are watching you videos all the way through (or at all), consider replacing them with text.
The bottom line (TLDR)
Video is just one content format option among many. From a development perspective, it’s time-consuming to produce and maintain; from an audience perspective, it takes longer to consume than text and it lends itself to “multi-tasking” (in other words, audiences can and do often watch it without getting much out of it).
Following best practices for video production and restricting video to specific instructional scenarios—highly visual content such as software navigation, real-life performances, and motivating introductions—allows us to leverage what video does well while minimizing its drawbacks.
What’s YOUR take?
Do you have a different point of view? Something to add? A request for an article on a different topic? Please considering sharing your thoughts, questions, or suggestions for future blog articles in the comment box below.

Leave a comment